

How to Make a Tattoo Stencil Online: A Step-by-Step Guide
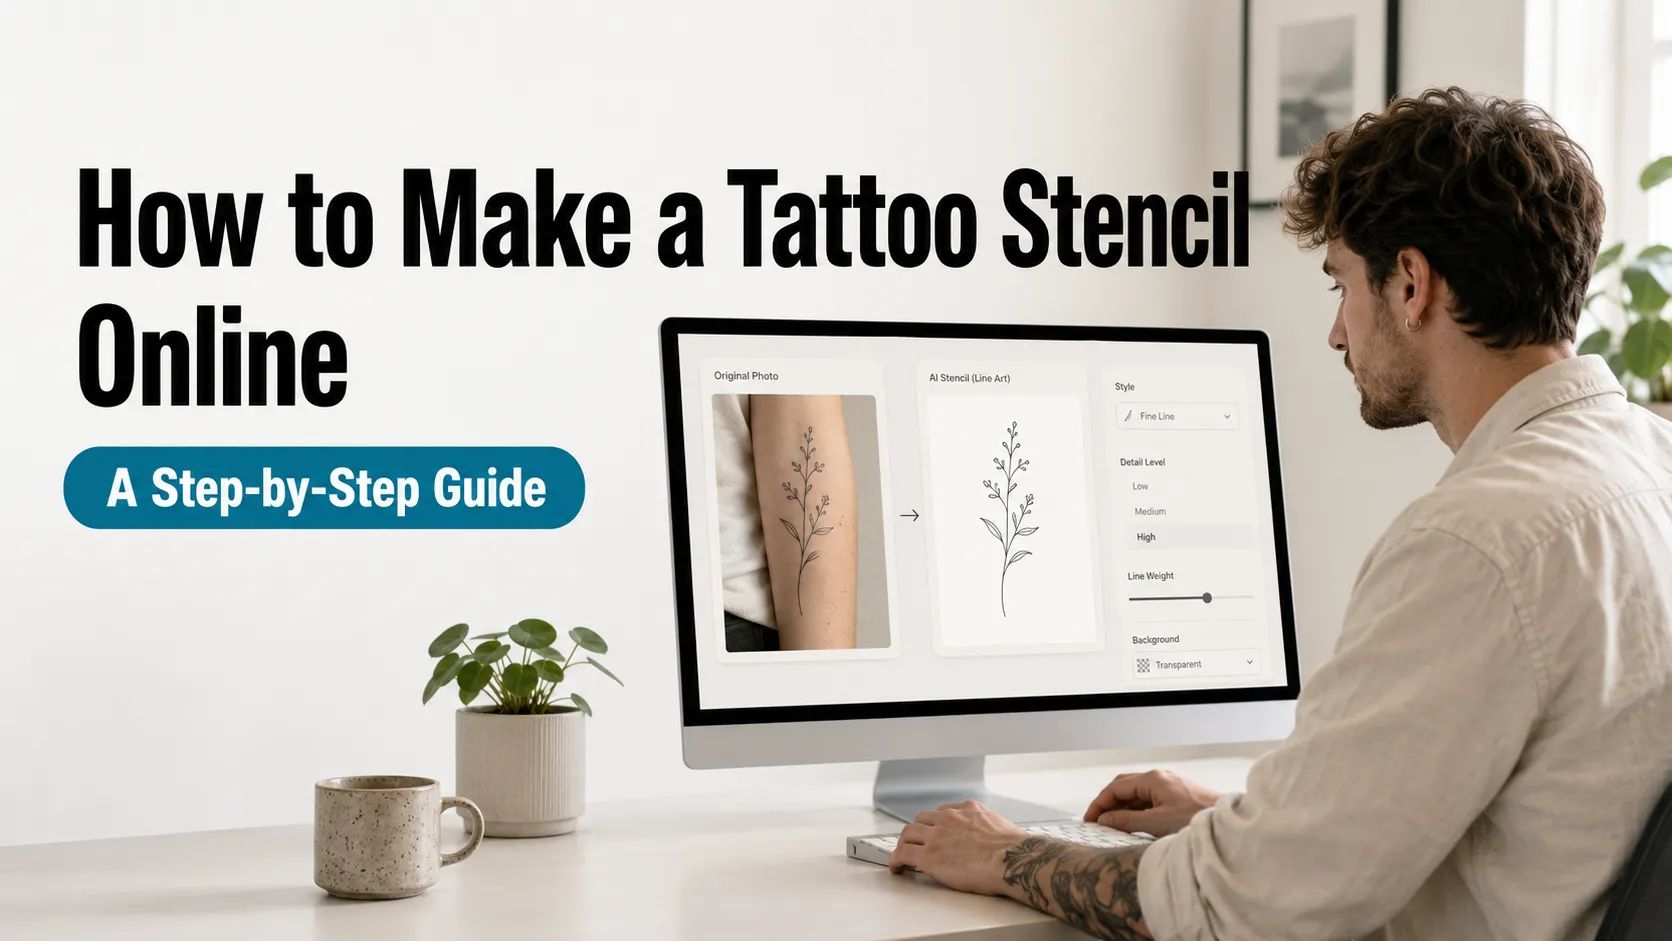
Turning a tattoo photo into a usable stencil is harder than working from a clean digital design. Skin texture, body curves, shadows, fading, and camera angles can hide important lines. An online tattoo stencil maker helps turn that photo into a cleaner design you can review, save, or share without tracing every line by hand.
The right result depends on your goal: clean black-and-white linework for printing, a version that preserves the original tattoo’s color and detail, or an upgraded design for reworking an old tattoo. This guide explains how to choose, prepare, and review each result.
Why Turning a Tattoo Photo Into a Stencil Is Difficult
A Tattoo Photo Is Not a Flat Design File
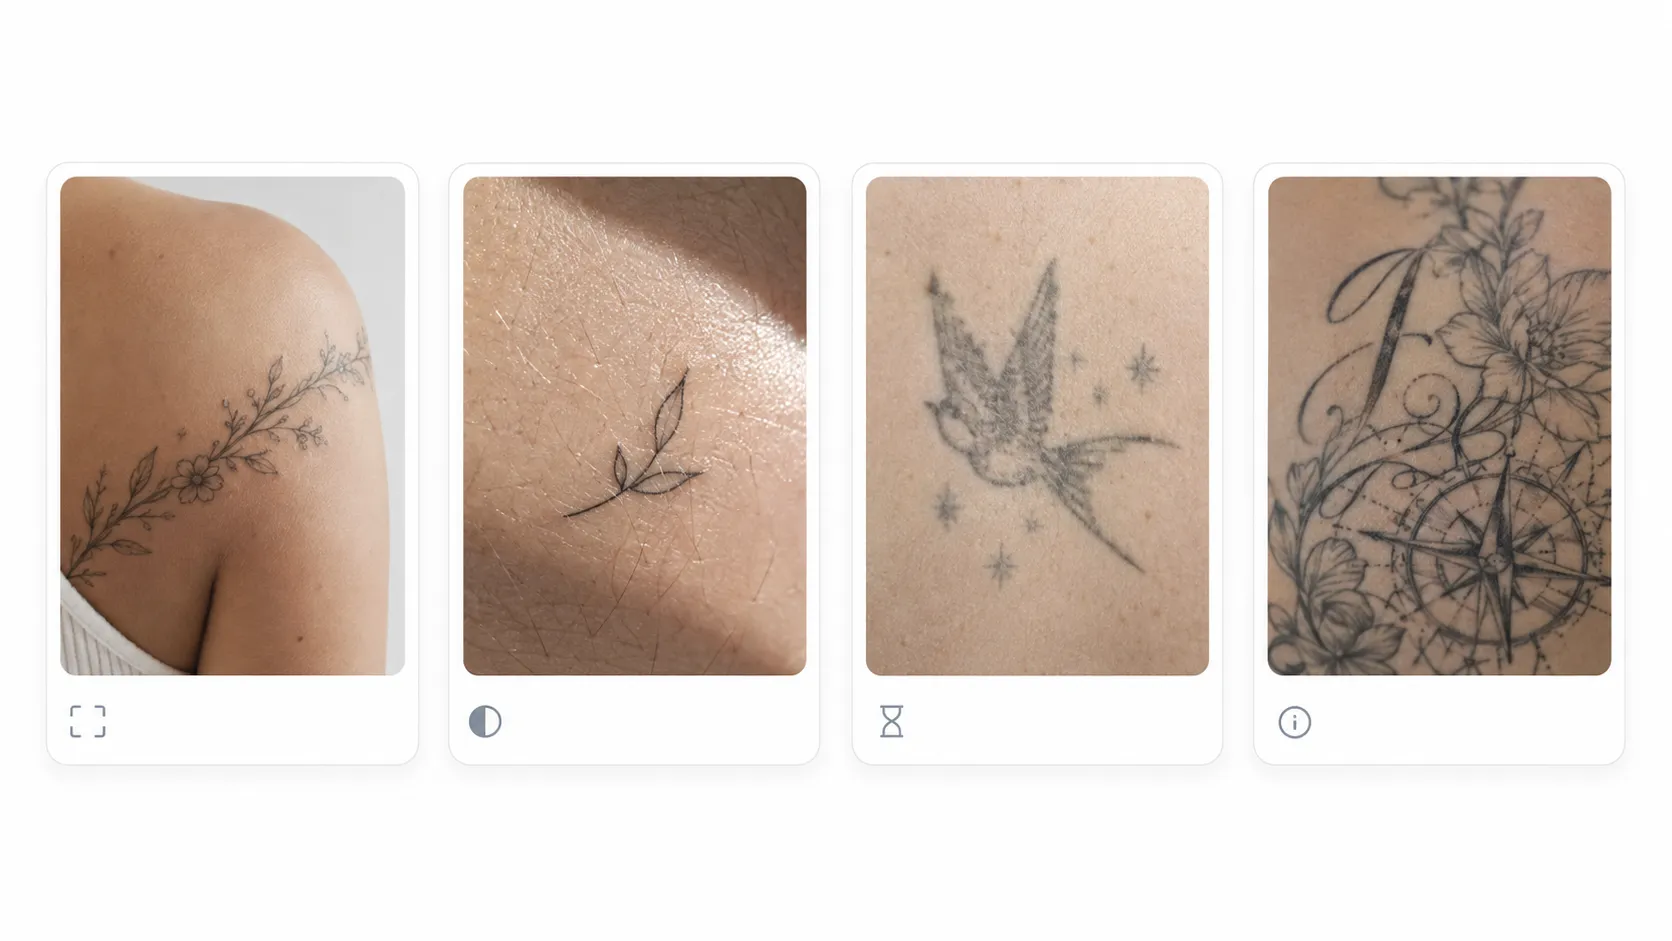
A tattoo follows the surface of the body. A circular design on a shoulder may look oval in a photograph, while lettering around an arm may appear compressed on one side. Camera distance, lens angle, posture, and the shape of the body can all change how the design looks. A useful digital result must interpret the tattoo as artwork rather than simply copying the visible pixels.
Skin, Hair, Shadows, and Glare Create False Lines
A normal photo contains many edges that do not belong to the tattoo. Hair, pores, clothing, skin folds, strong highlights, and dark shadows can all become unwanted marks when a basic outline filter is applied. This is why a generic black-and-white effect often produces a noisy image instead of usable tattoo linework.
Old Tattoos May Have Faded or Blurred Details
Ink naturally changes in appearance over time. Fine lines may soften, dark areas may spread slightly, and colors may lose contrast against the skin. If part of the tattoo is hidden by shadow or fading, the tool must interpret an incomplete structure. The less information the source photo contains, the more carefully any reconstructed detail needs to be reviewed.
Manual Tracing Requires Time and Judgment
Manual tracing is not only a matter of following visible edges. The person tracing must decide which shadows indicate structure, which details will remain readable at the intended size, and which marks should be removed. This can be manageable for a simple symbol, but portraits, florals, geometric patterns, lettering, and highly shaded tattoos require considerably more time and design experience.
What Is an AI Tattoo Stencil Maker?
From a Tattoo Photo to Reusable Artwork
An AI tattoo stencil generator analyzes an uploaded tattoo photo, sketch, flash design, or digital artwork and produces a new image for a specific purpose. Depending on the selected mode, the result may emphasize clean outlines, preserve the existing artwork, or reinterpret the design with improved structure and detail.
AI does not simply uncover a hidden original file inside the photo. It interprets the visible information and creates a new representation of it. This distinction matters most when the source is blurry, distorted, faded, partly hidden, or photographed from an angle.
AI Tattoo Tools vs. Generic Outline Filters
A generic outline converter usually reacts to every strong edge in the image. It may treat skin texture, hair, background objects, and tattoo lines in the same way. A tattoo-focused workflow instead aims to identify the artwork as the main subject and produce an output suited to tattoo planning, preservation, or redesign.
This does not remove the need for human review. AI can misread small lettering, merge nearby lines, simplify subtle shapes, or create details that were not clearly visible in the source. The result should be treated as an editable design reference, not unquestioned evidence of the original artwork.
What Images Can Be Used?
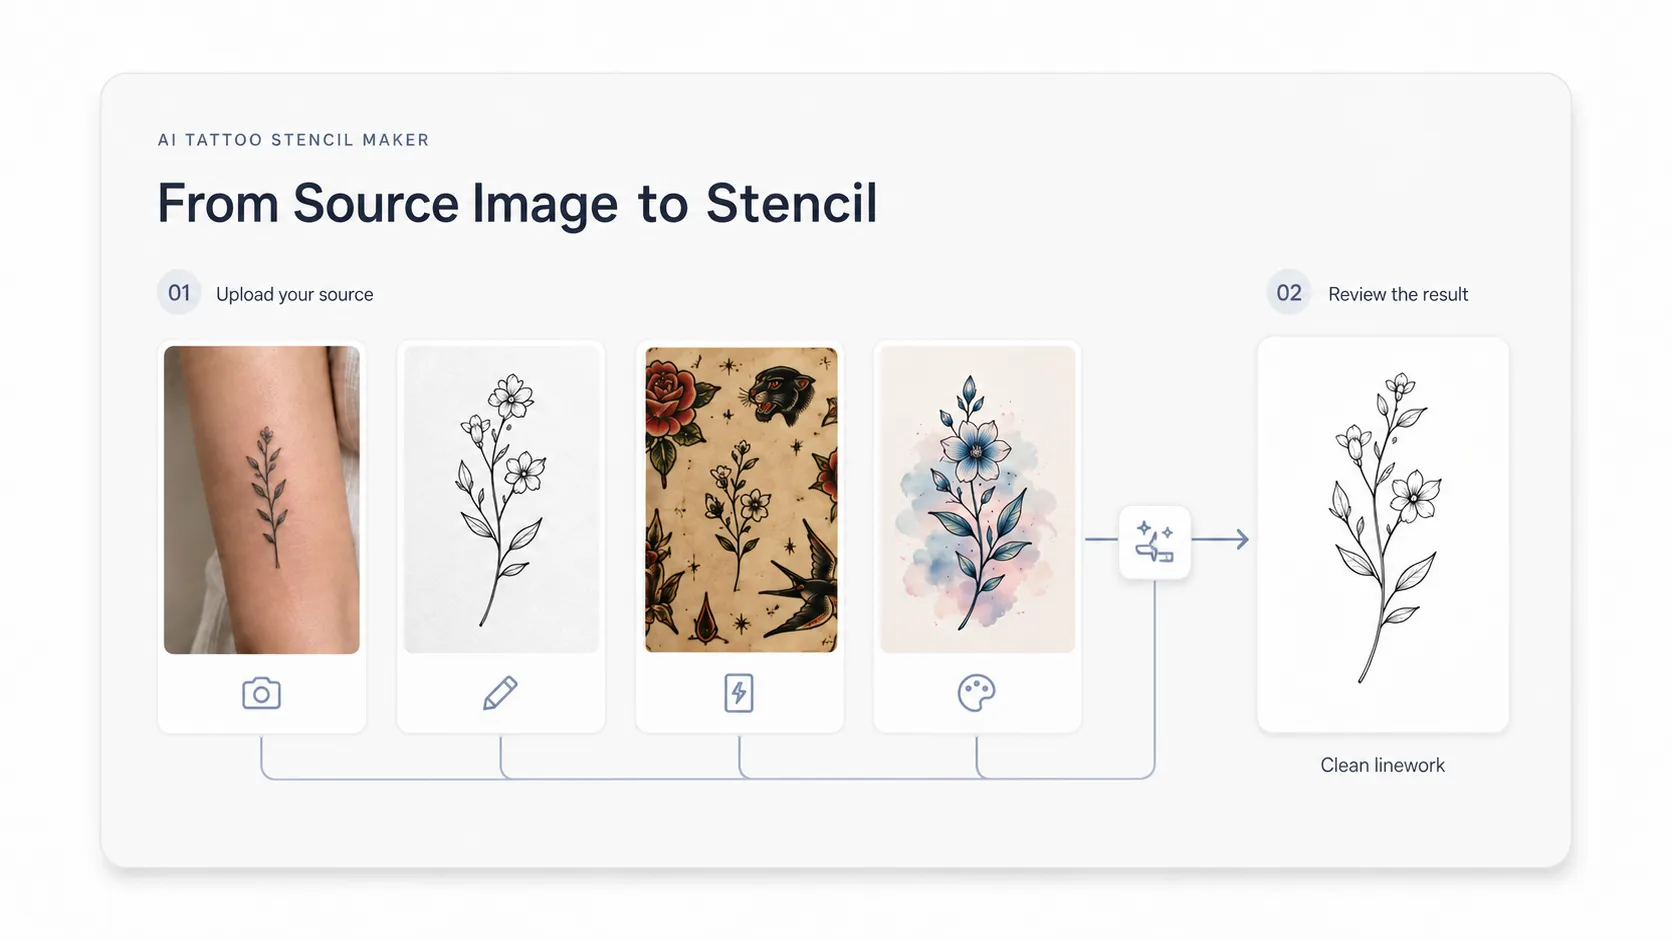
You can turn a photo into a tattoo stencil from several types of source material, including a tattoo photographed on skin, a hand-drawn sketch, a flash design, a digital illustration, or a colored tattoo concept. Clean drawings are usually easier to process, while photos taken on skin require more interpretation.
The most suitable source depends on your goal. Use the original digital artwork when it is available. Use a tattoo photo when the original file has been lost or when you need to recover an existing design. Use a sketch when the idea is established but the linework still needs cleaning or development.
Why Make a Tattoo Stencil With AI?
Create Linework Without Drawing Every Line Manually
Traditional digital tracing often involves creating layers, adjusting contrast, drawing paths, cleaning edges, and repeatedly zooming in to check small details. AI shortens the first stage by producing an interpreted version of the image. You can spend more time evaluating the structure and less time rebuilding the entire design from a blank canvas.
Start With an Existing Tattoo, Not Just Original Artwork
Many people no longer have the artwork used for an older tattoo. The design may have come from an old sketch, a former artist, or a file that was never saved. An AI workflow lets the current tattoo photo become the new starting point for archiving, discussion, reworking, or creating cleaner linework. If you are starting with an idea rather than an existing tattoo or artwork, an AI tattoo generator can help you create an original design before turning it into a stencil.
Compare Different Outputs From the Same Source
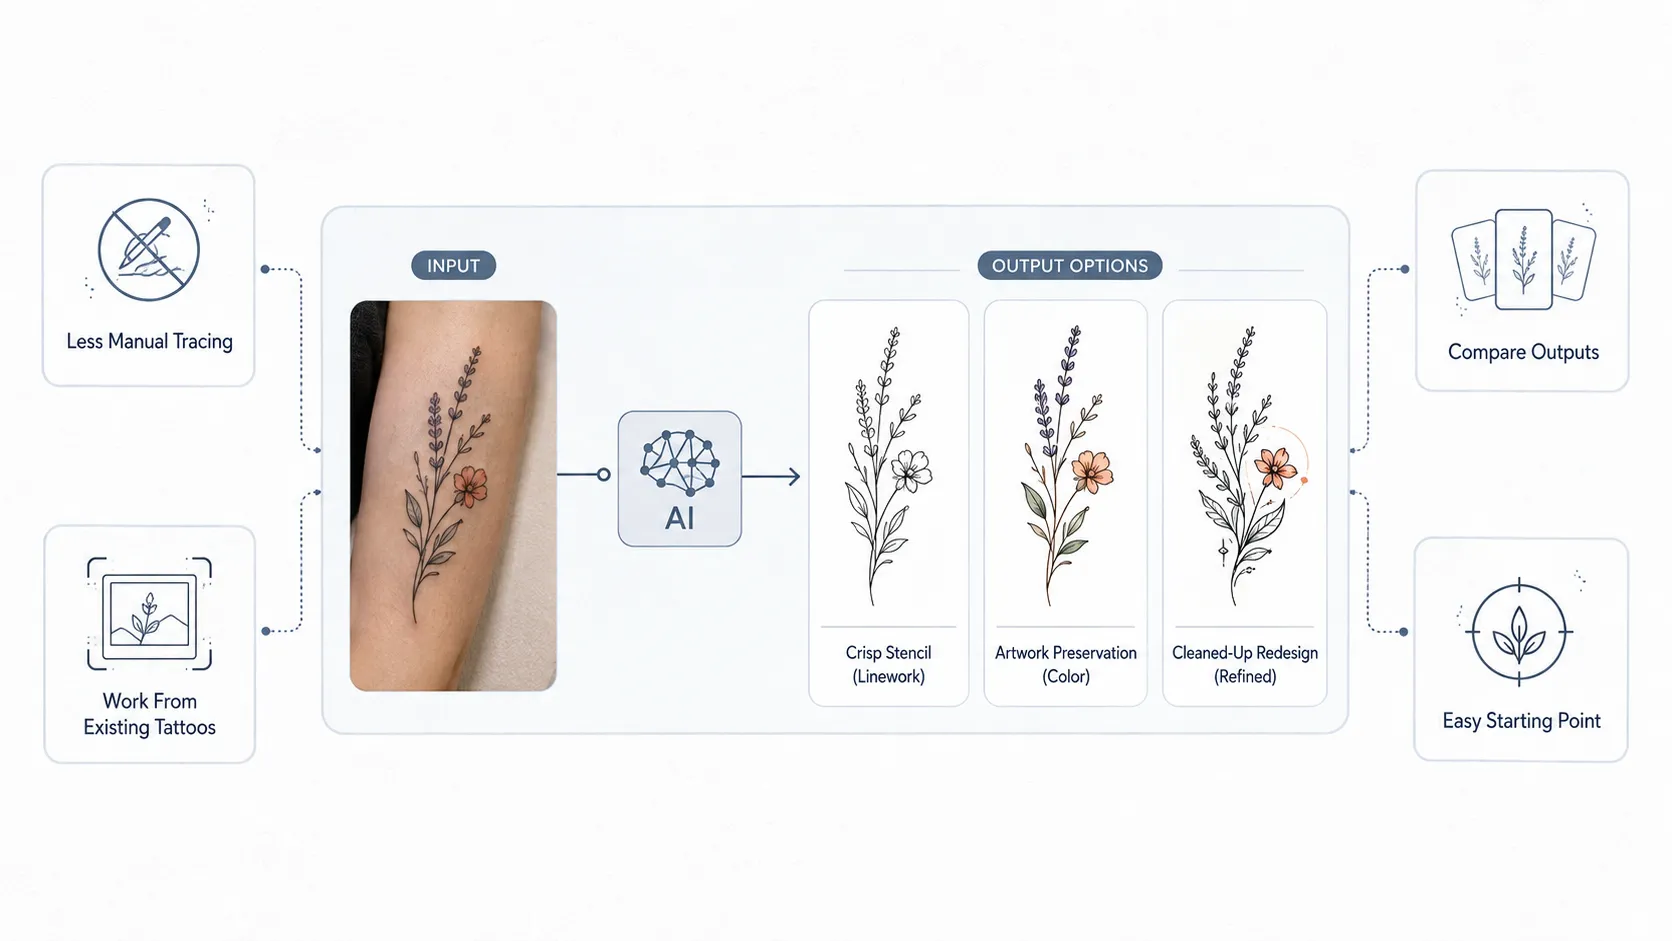
A single black-and-white filter assumes that every user wants the same result. In practice, someone preparing a stencil needs a different output from someone preserving a colored tattoo or exploring a redesign. Generating purpose-specific versions makes it easier to compare the original structure, printable linework, and a possible upgraded direction.
Make the Early Planning Stage More Accessible
AI can make the early stage easier for people who do not use Photoshop, Procreate, or professional tattoo software. It gives tattoo enthusiasts a clearer visual reference and gives artists a faster starting point. Final line weight, sizing, placement, and technical application should still be reviewed by a professional tattoo artist.
| Workflow | Main work required | Best suited to |
|---|---|---|
| Manual tracing | Draw and clean each important line | Full manual control |
| Generic outline filter | Adjust contrast and remove unwanted edges | Simple, flat images |
| AI tattoo processing | Upload, choose an output, and review | Tattoo photos, sketches, and faster comparisons |
Three Output Modes for Different Tattoo Goals
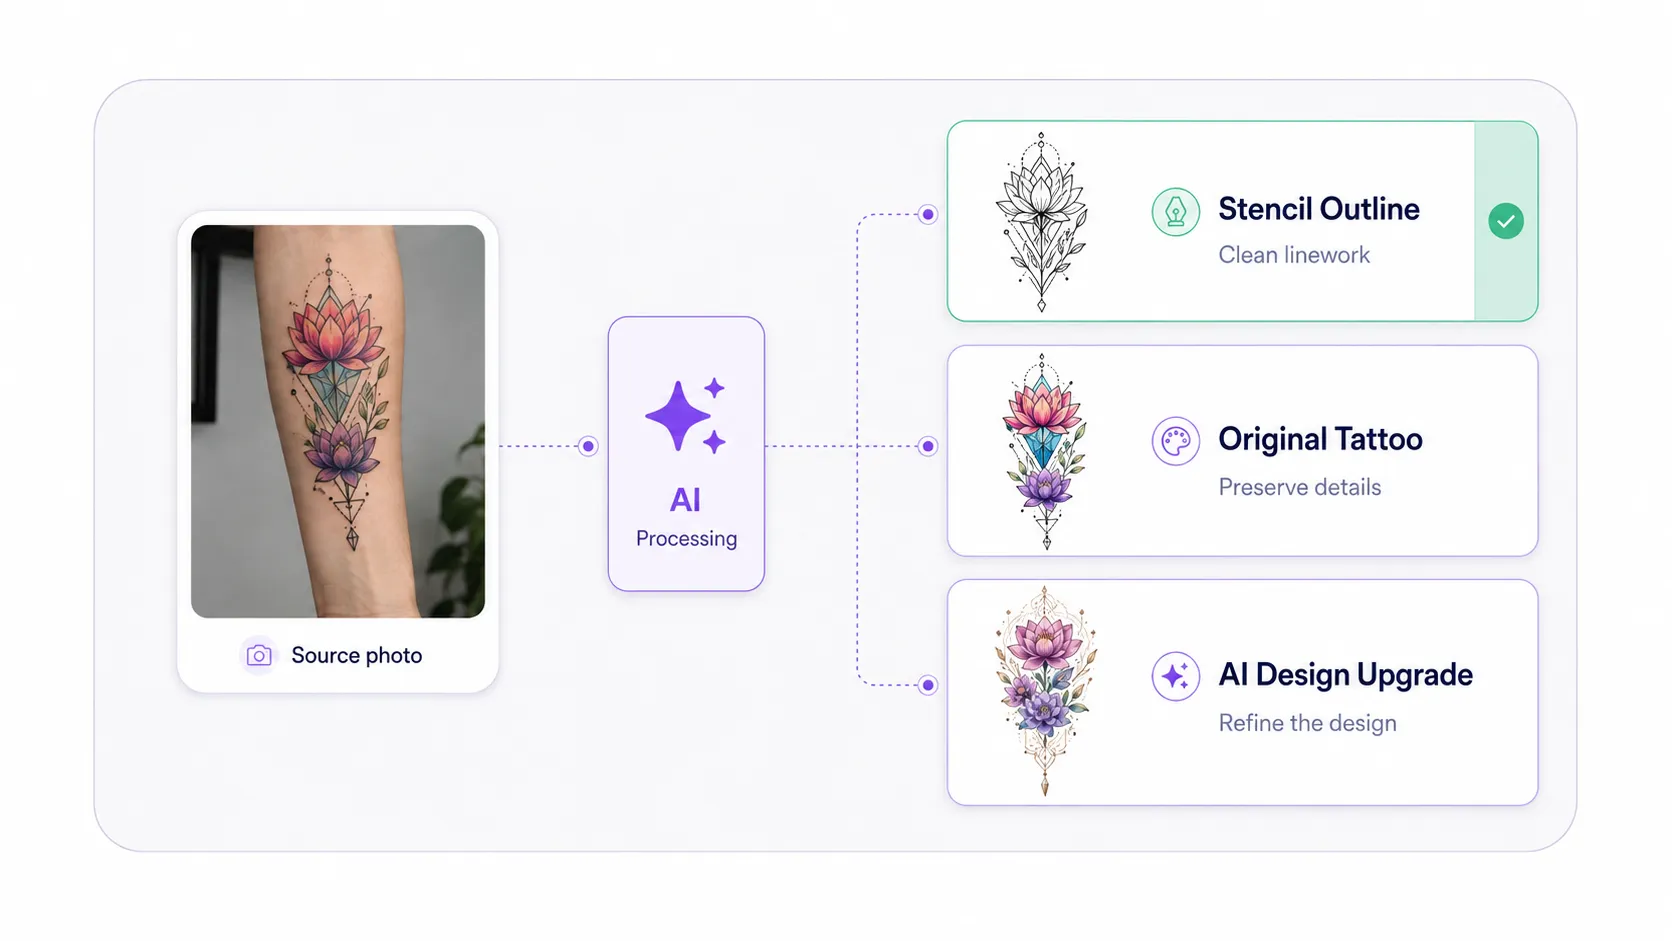
The same tattoo photo can require very different treatment depending on what you plan to do next. A photo taken on skin contains more than the tattoo itself. It may also include pores, hair, glare, shadows, body contours, perspective distortion, and nearby ink. The three output modes process this information differently, allowing you to extract linework, recover the original appearance, or develop a revised design.
Stencil Outline for Clean Black-and-White Linework
Stencil Outline is designed to separate the tattoo’s structural lines from the skin and photographic details around them. Instead of applying a basic edge filter to every visible mark, it focuses on the contours that define the tattoo while reducing distractions such as skin texture, hair, glare, uneven lighting, and background objects.
This is especially useful when the tattoo is photographed on a curved area such as an arm, shoulder, leg, or rib. Body curvature and camera angle can make circular elements appear oval, compress lettering on one side, or bend lines that were originally drawn on a flatter design. The mode aims to produce a more readable, flattened representation that is easier to inspect, edit, resize, or prepare as a stencil draft.
A strong result should preserve the main silhouette, important internal boundaries, and meaningful details without turning every shadow into a hard line. For example, a floral stencil may retain the petal edges and selected folds while removing skin shadows between them. A portrait stencil may preserve facial landmarks while simplifying soft shading that would create unnecessary visual noise.
The generated outline should still be checked against the source photo. For complex designs, compare the result with several photographs taken from different angles and ask a tattoo artist to review line weight, scale, orientation, and missing details before printing or transferring it.
Original Tattoo for Recovering Colors and Visual Details
Original Tattoo is intended for users who want to recover a clearer representation of the existing artwork instead of reducing it to black-and-white linework. It keeps the tattoo’s colors, shading, texture, and decorative details while reducing the visual influence of skin, lighting, and the surrounding photograph.
This mode is useful when the original artwork has been lost and the tattoo photo is the only available reference. It can create a flatter, easier-to-review version for archiving, discussing a touch-up, comparing faded areas, or showing an artist which parts of the original design should remain unchanged.
Because this mode preserves more visual information, it is not the same as a printable stencil. Soft shading, color transitions, highlights, and textured fills may still need to be translated into appropriate stencil lines by a tattoo artist. Treat the result as a recovered visual reference rather than a final transfer file.
When reviewing the output, compare color placement, shading direction, lettering, symbols, and the proportions of major elements with the original photo. Uneven lighting or faded ink can affect how the tool interprets the design, so visually cleaner output does not always mean it is more historically accurate.
AI Design Upgrade for Refining or Reworking the Design
AI Design Upgrade is intended for cases where preserving the existing tattoo exactly is not the main goal. It uses the uploaded image as a visual starting point, then develops a cleaner or more complete interpretation of the design. This may include refining uneven shapes, improving balance, clarifying unclear elements, strengthening the composition, or developing areas that look unfinished.
For example, the mode can help explore how a faded floral tattoo might look with clearer petals, how an incomplete ornamental design could become more balanced, or how rough sketch lines could be developed into a more cohesive tattoo concept. It is useful during early redesign discussions, especially when the existing tattoo contains an idea worth keeping but needs more structural or stylistic work.
Unlike Stencil Outline, this mode may intentionally change proportions, internal lines, decoration, or visual style. It may also interpret unclear areas instead of reproducing them exactly. For this reason, it should not be used to recover dates, names, cultural symbols, memorial details, or other elements that must remain precise without careful review.
Compare the upgraded design with the original and identify which changes are helpful, which details must be restored, and which areas need further revision. The result works best as a concept for discussion. A professional tattoo artist should still adapt it to the existing ink, available skin space, body anatomy, placement, and technical requirements of the final tattoo.
| Your goal | Recommended mode | Main result |
|---|---|---|
| Create clean linework | Stencil Outline | Black-and-white structural lines |
| Preserve the current tattoo | Original Tattoo | Colors, shading, and original details |
| Improve or reinterpret the design | AI Design Upgrade | A refined or redesigned version |
How to Convert a Photo to a Tattoo Stencil Online for Free
An online tattoo stencil tool simplifies the workflow into a few important decisions. Instead of manually tracing every line, you can choose a suitable source image, select the output that fits your goal, and review whether important details remain accurate before using the result.
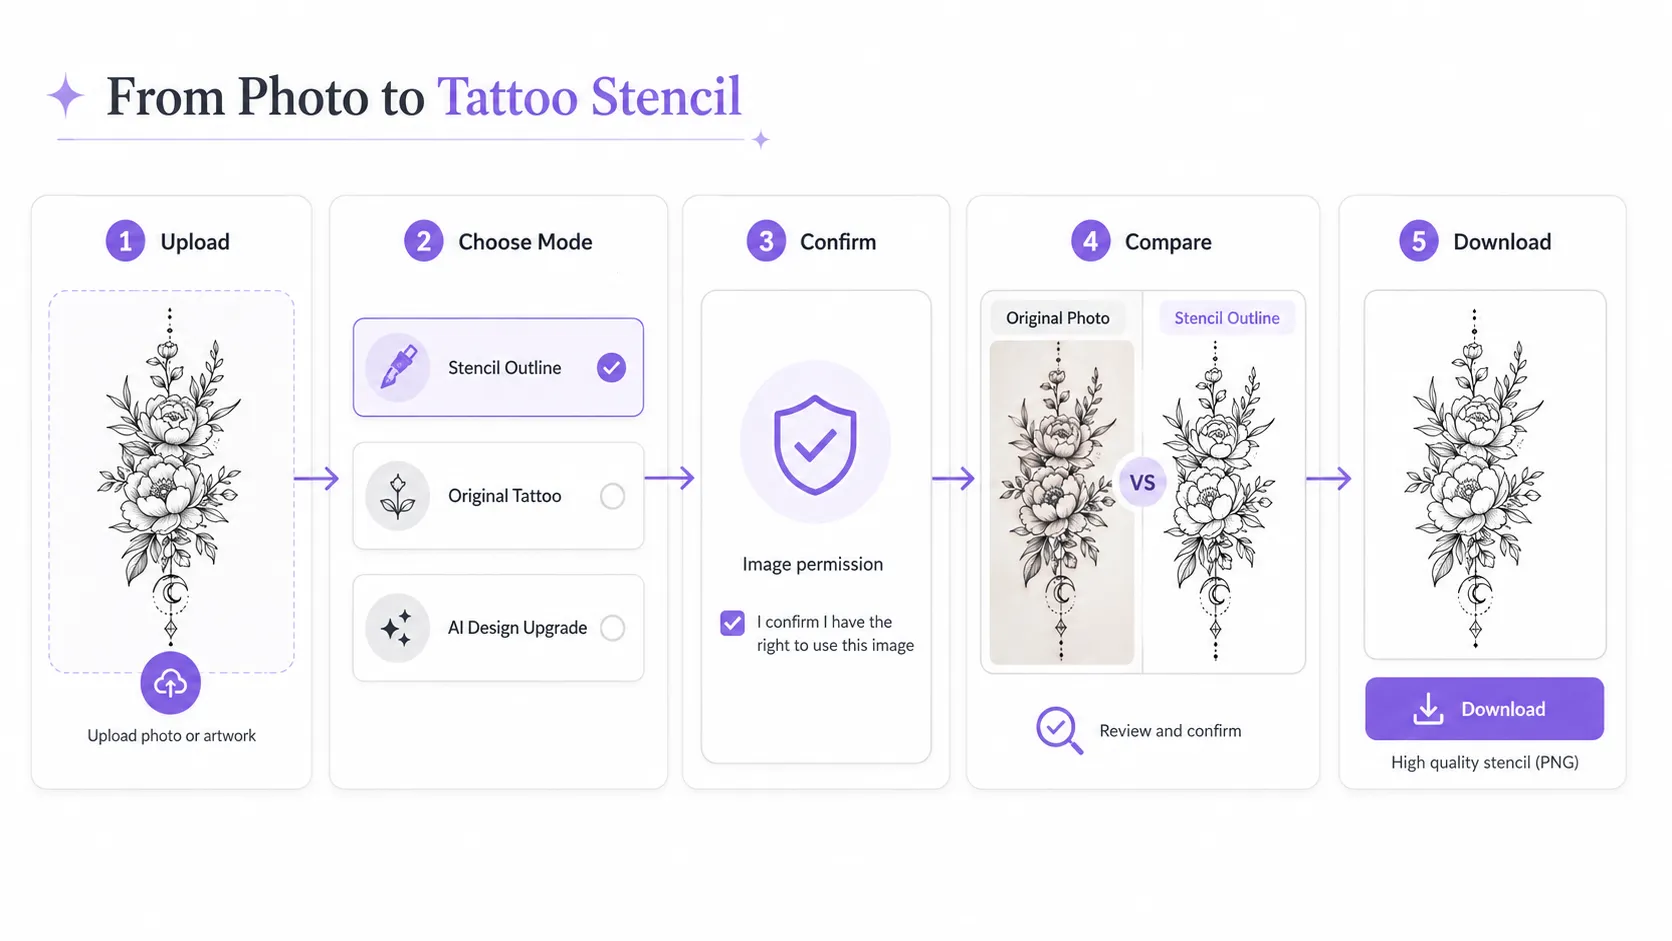
Step 1: Upload Your Tattoo Photo or Artwork
Upload a PNG, JPG, or WEBP image. The source can be a tattoo photo, sketch, flash design, or digital artwork. Choose the clearest version available and make sure the full subject remains visible. Avoid using a screenshot that has already been heavily compressed if the original image is available.
Step 2: Choose the Output Mode
Select Stencil Outline when you need clean black-and-white linework. Choose Original Tattoo when you want to preserve the existing design’s colors and details. Choose AI Design Upgrade when you want the tool to improve or reinterpret the tattoo rather than reproduce it closely.
Step 3: Confirm You Have Permission to Use the Image
Use your own tattoo photo, original artwork, or an image you are authorized to process. A custom tattoo created for another person may belong to the original artist or client. If you are using external inspiration, treat it as a reference for developing a new design rather than copying a distinctive tattoo exactly.
Step 4: Generate and Compare the Result
Place the result beside the source image instead of judging it alone. Check the main silhouette first, followed by important internal lines, lettering, dates, symbols, and symmetrical elements. This order helps you catch structural errors before spending time examining minor decorative details.
Step 5: Download the Result for the Right Next Step
Download the selected result once its purpose is clear. Stencil Outline can become the basis for further cleanup or printing. Original Tattoo can be archived or used during a consultation. AI Design Upgrade can serve as a new concept that still needs creative and technical refinement.
How AI Handles Difficult Tattoo Photos
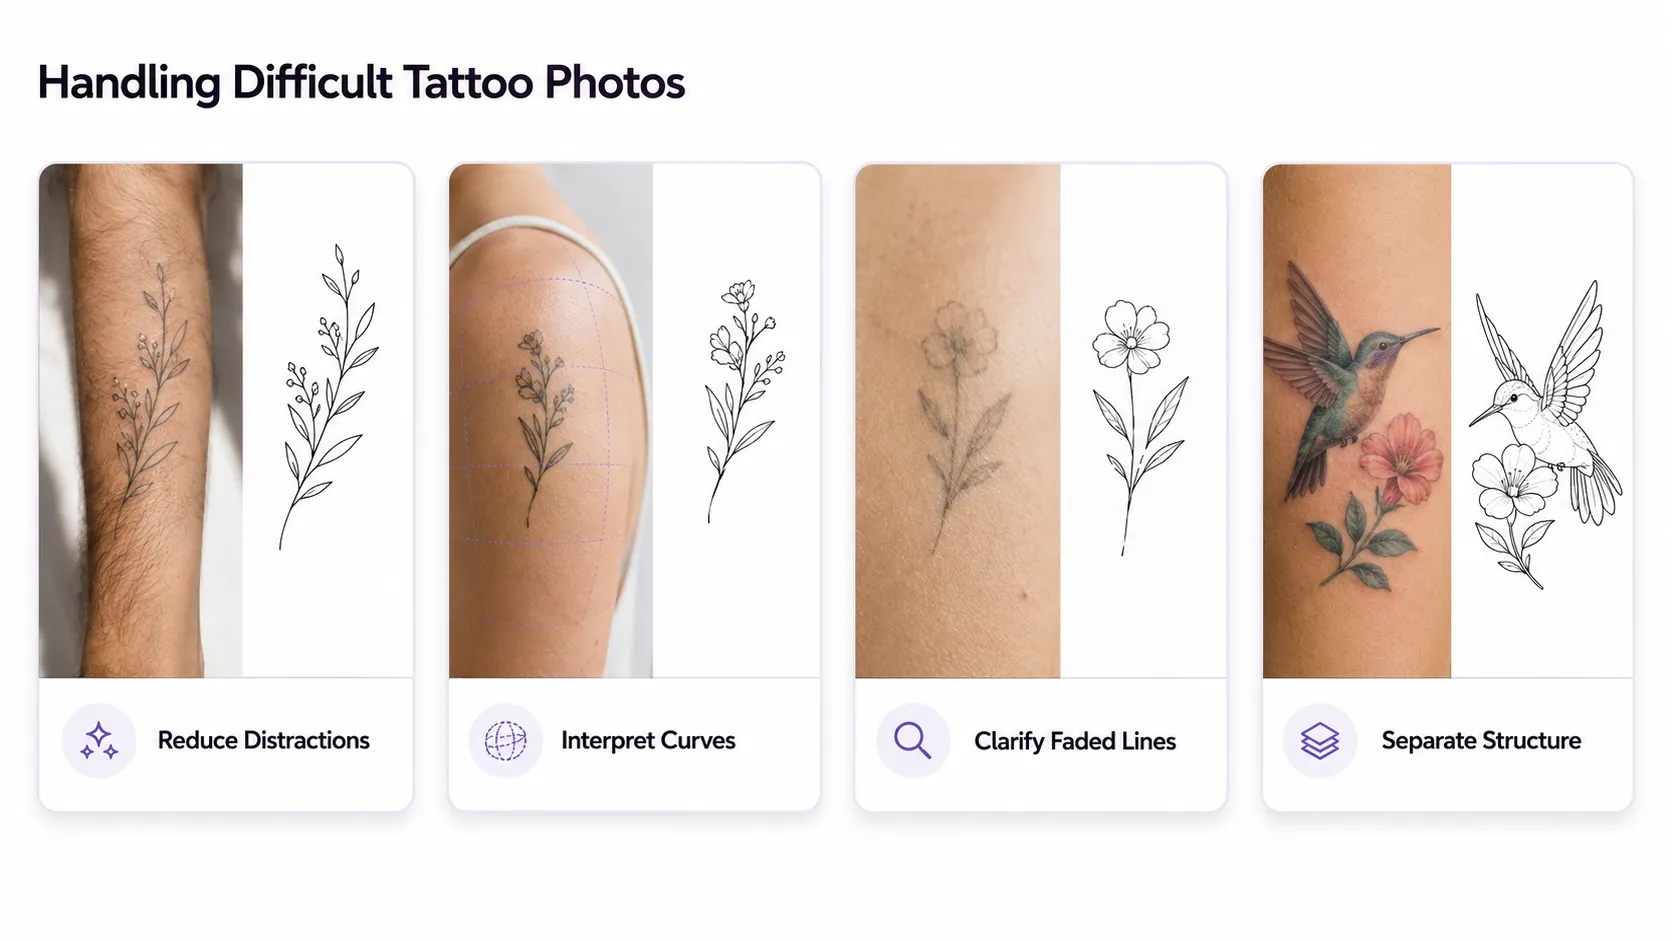
Reducing Skin and Background Distractions
A tattoo photo may contain skin texture, hair, clothing, nearby tattoos, furniture, or other background objects. The AI aims to interpret the tattoo as the main subject, but a tightly framed photo still produces a clearer task. Removing irrelevant surroundings before upload reduces the chance that unrelated shapes influence the result.
Interpreting Tattoos on Curved Body Areas
Photos taken on arms, legs, shoulders, ribs, and other curved areas may stretch or compress part of the design. AI can help produce a cleaner design reference, but it cannot recover visual information that the camera never captured. A straight, centered photograph remains more reliable than asking the tool to infer a heavily hidden side of the tattoo.
Clarifying Faded or Low-Contrast Lines
When old ink has weak contrast against the skin, the AI may strengthen visible contours and infer how nearby lines connect. This can produce a clearer design, but clarity should not be confused with historical accuracy. If a faded line carries personal meaning, compare it with older photographs or ask the original artist when possible.
Separating Structure From Color and Shading
Colored and realistic tattoos contain soft transitions that are important to the finished appearance but unsuitable as hard stencil lines. The tool must distinguish structural boundaries from gradients and texture. When reviewing the result, ask whether each line helps define placement and form, or whether it merely records a shadow from the photograph.
How to Prepare a Photo for Better AI Stencil Results
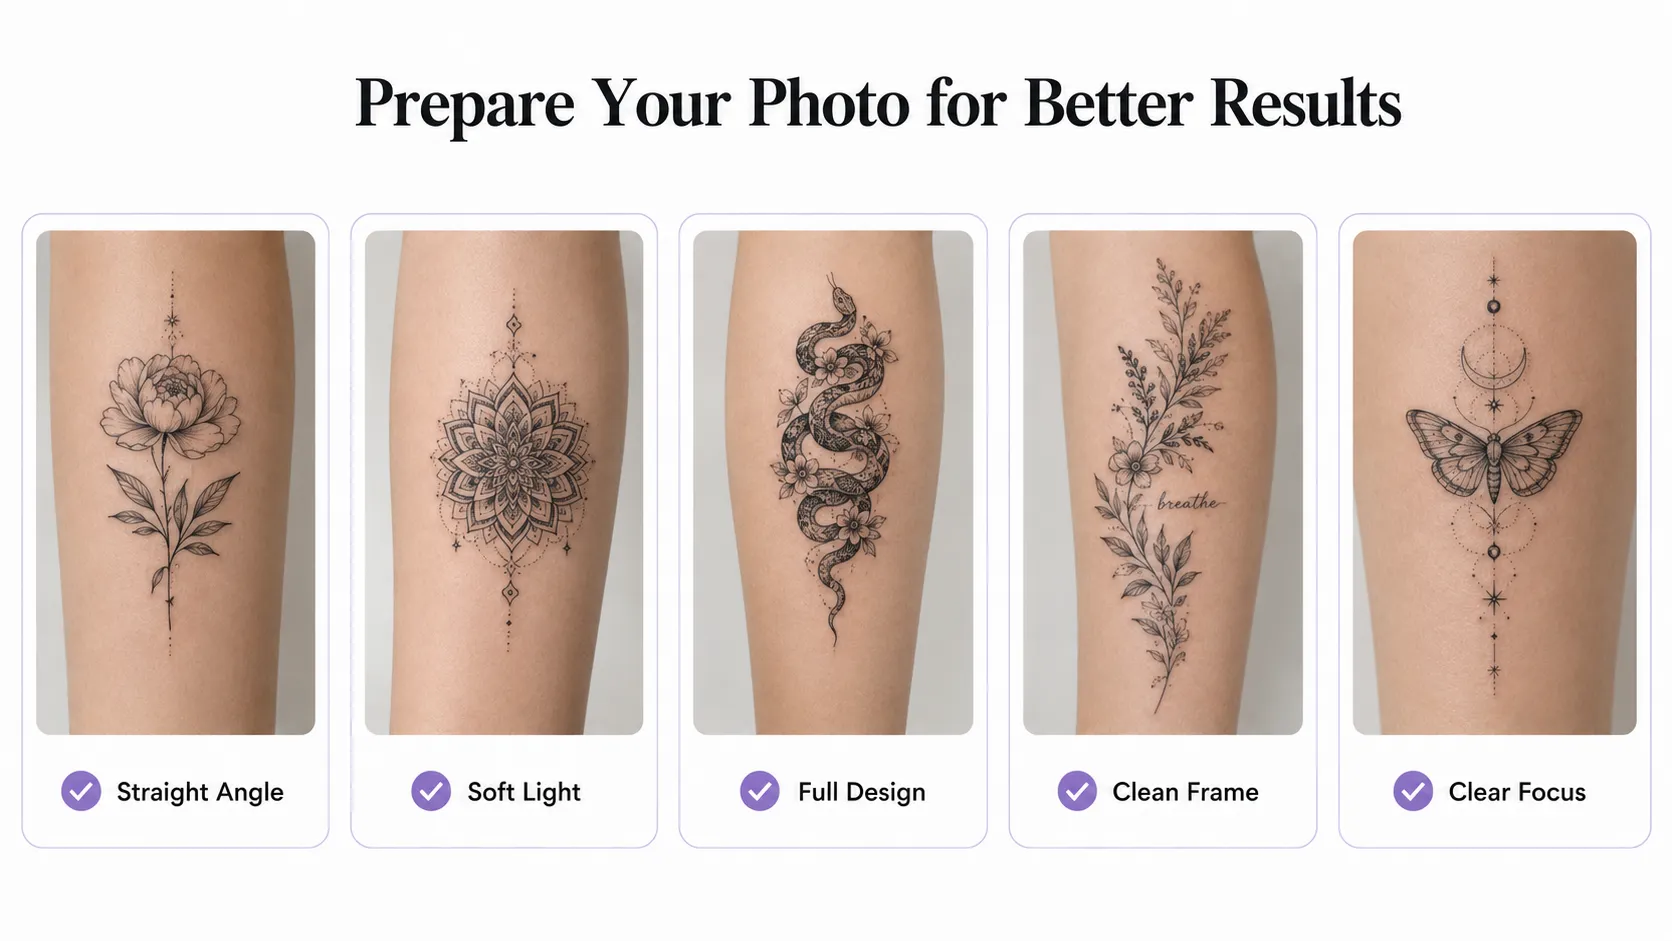
Photograph the Tattoo From a Straight Angle
Keep the camera as parallel as possible to the tattooed area. Center the tattoo in the frame and avoid photographing it sharply from above, below, or the side. If the design wraps around a limb, take several clear photographs rather than forcing the entire tattoo into one distorted view.
Use Soft, Even Lighting
Natural window light or evenly diffused indoor light usually reveals lines more clearly than direct flash. Strong flash can create bright glare, especially on moisturized skin, while harsh side lighting may hide one part of the design in shadow. Even illumination gives the AI more consistent information across the tattoo.
Keep the Entire Design Visible
Do not crop off the end of lettering, the edge of a flower, the tip of a wing, or the border of a geometric design. Missing edges may encourage the AI to complete the shape based on visual patterns rather than the original tattoo. Leave a small amount of surrounding skin so the tool can see where the artwork ends.
Reduce Unrelated Visual Noise
Move clothing, jewelry, cables, and other objects away from the photographed area. If other tattoos are close to the target, crop carefully so the intended design remains clear without cutting into it. A simple composition helps the tool identify which marks belong together.
Choose Accuracy Over Resolution Alone
A large image is not automatically the best source for photo to tattoo stencil conversion. A smaller, sharply focused photo taken from a straight angle can be more useful than a high-resolution image with glare, motion blur, or severe perspective distortion. Before uploading, zoom in and confirm that important words, dates, and line intersections are genuinely readable.
How to Review an AI-Generated Tattoo Stencil
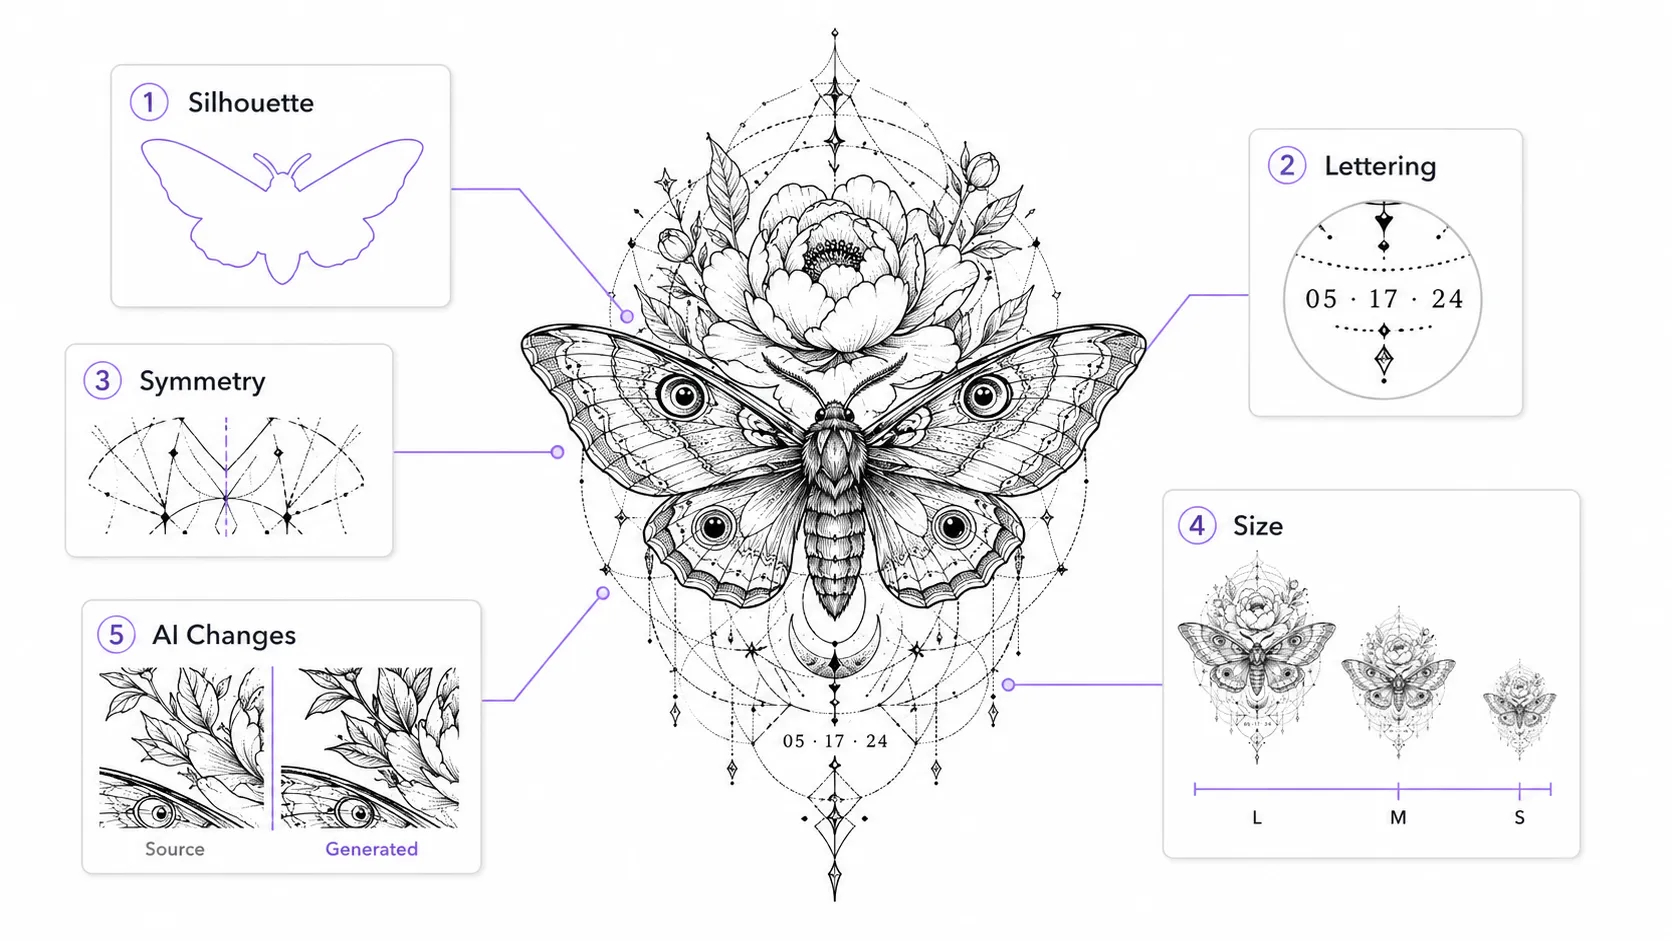
Check the Main Silhouette First
Look at the design at a normal viewing size before zooming in. The overall shape, balance, and direction should still match the source. If a bird’s wing angle, a flower’s outer contour, or a portrait’s head shape is already wrong, perfecting small internal details will not solve the larger structural problem.
Review Lettering, Dates, and Personal Symbols
Words and numbers deserve separate inspection because a visually small change can alter their meaning. Verify spelling, punctuation, dates, initials, coordinates, Roman numerals, and culturally significant symbols one character at a time. Do not approve them based only on their overall appearance.
Examine Symmetry and Repeated Patterns
Mandala designs, geometric tattoos, ornamental borders, and paired elements make small inconsistencies easy to notice. Compare both sides, check repeated spacing, and look for lines that end too early or connect to the wrong point. A result can look polished while still containing subtle structural errors.
Check Detail at the Intended Tattoo Size
A stencil that looks clear when enlarged may become crowded when reduced to wrist, ankle, or finger size. Preview the design at approximately the intended dimensions. Fine parallel lines should remain separate, small gaps should stay visible, and important shapes should not merge into a single dark area.
Identify What Was Extracted and What Was Reinterpreted
Stencil Outline and Original Tattoo generally aim to stay closer to the source, while AI Design Upgrade intentionally allows more creative change. Even so, all three modes involve image interpretation. Mark any uncertain line and discuss it with the tattoo artist instead of assuming that a confident-looking AI result must be correct.
What Can You Do With the Generated Result?
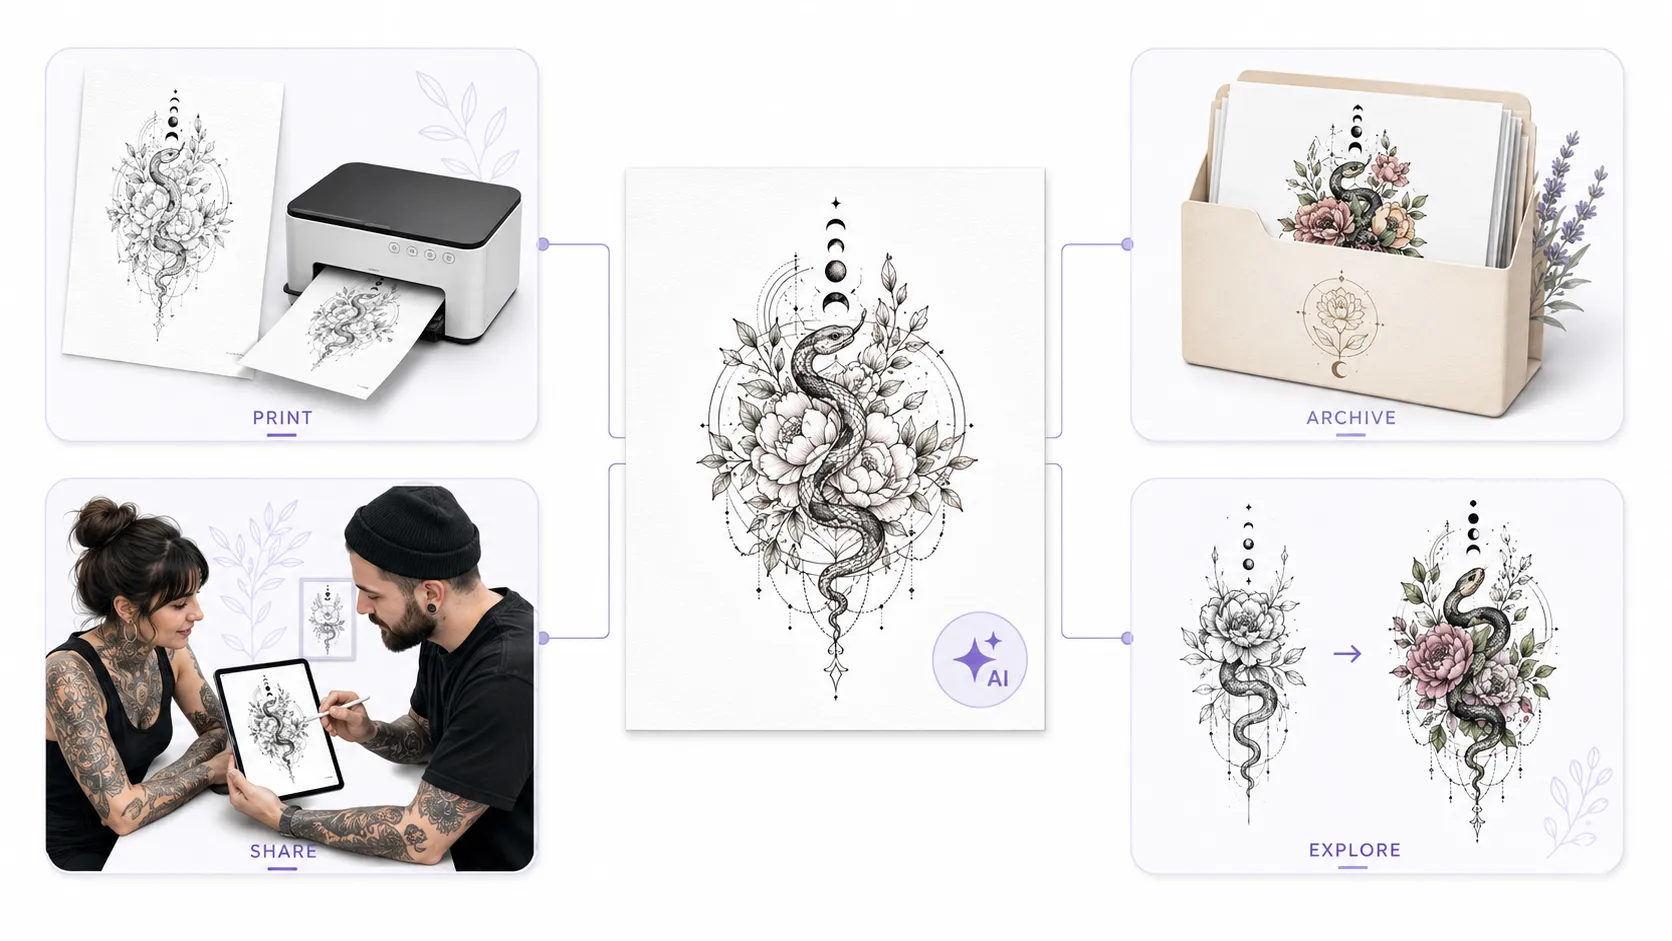
Prepare a Printable Stencil Draft
Stencil Outline can provide a cleaner base for printing, but final preparation should consider physical size, line weight, orientation, printer settings, and the transfer method used by the artist. Print at the intended scale and let a trained tattoo artist approve the file before it is transferred to skin.
Recover and Archive an Existing Tattoo
Original Tattoo provides a way to preserve an existing design when the original drawing is no longer available. The recovered artwork can document how the tattoo looks now, support future touch-up discussions, or provide a visual record before a cover-up or major rework.
Share a Clearer Reference With a Tattoo Artist
A flat, readable image is easier to discuss than a casual phone photo taken at an angle. Use it to explain which features must remain unchanged, which areas may be simplified, and where the artist has creative freedom. This makes the generated image a conversation tool rather than an automatic final instruction.
Explore a Refined or Reworked Direction
AI Design Upgrade can help visualize how an old, uneven, or unfinished tattoo might evolve. Use the result to compare compositions, test stronger visual balance, or identify details worth keeping. A professional artist can then adapt the preferred direction to the existing ink, available skin space, body anatomy, and technical limitations.
Turn Your Tattoo Photo Into a Clearer Design
A clear tattoo reference starts with a good source photo, the right output choice, and a careful review of important details. This makes it easier to preserve an existing design, prepare cleaner linework, or discuss changes with a tattoo artist before anything reaches the skin. Try the Tattoo to Stencil Converter to turn your tattoo photo or artwork into a clearer design reference.